Choose the size from the deepest feature you must reach, then confirm that the base, rod, contact tip and available clearance fit the part. By the end, you will be able to convert a feature list into a usable range and distinguish a suitable digital depth micrometer from a faster but less stable alternative.
Key takeaways
- Measure the deepest feature from its actual datum surface.
- Add travel margin so the spindle avoids its final millimetres.
- Confirm the base sits flat and the contact tip reaches the bottom.
- Choose a depth gauge instead when access or feature shape defeats the micrometer.
Start with the deepest feature, not the instrument label
Select a digital depth micrometer size from the shallowest and deepest features you need to measure, not from the instrument label. Measure from the actual datum surface to the bottom of the deepest feature, then add working margin so the screw or rod does not operate in its final millimetres of travel.
The shallowest feature also matters: a rod set must include an interval that reaches it without leaving the contact tip unsupported.
Common depth micrometer sizes include:
| Option | What it covers | Check before buying |
|---|---|---|
| 0–25 mm | Shallow features up to about 25 mm | Confirm usable range and margin |
| 25–50 mm | Features in the next depth interval | Confirm the supplied rod and starting depth |
| 50–75 mm | Deeper features in that interval | Confirm access and actual rod length |
| 75–100 mm | Features approaching 100 mm | Avoid relying on end-of-travel |
| 0–3, 0–6, 0–12, 0–18 in | Common inch ranges | Verify the maker’s actual usable range |
| 0–75, 0–150, 0–300, 0–450 mm | Common metric extended ranges | Check how rods create the total range |
The size normally describes maximum measuring depth or rod range, not base width. A long-range digital depth micrometer may use interchangeable rods: the set covers several intervals, but each rod is not suitable for every feature. Check rod increments, quantity, storage, and calibration or interchangeability specifications before choosing a set.
Check whether the base and contact tip can reach the feature
A nominally correct range is useless if the base cannot bridge the opening or the rod cannot reach the bottom. Identify the reference surface, measure from it to the deepest feature, and include clearance around the opening before choosing a digital micrometer.
The base must sit across the reference surface without rocking. A wide base is steadier on a broad, flat face; a narrow base fits between walls, near shoulders, and across closely spaced webs.
Base width and thickness are separate from measuring depth, so do not infer either dimension from a 0–75 mm or 0–3 in range.
The rod must clear surrounding walls and reach the bottom without touching a radius or chamfer. Tip form matters:
| Contact end | Best use | Risk to check |
|---|---|---|
| Flat | Relatively flat bottoms | Can bridge or miss a curved bottom |
| Ball | Restricted openings and curved areas | May sit differently in a corner |
| Small-radius | Narrow features and limited access | Contact position can shift in a radius |
Before buying, test a drawing or sample part and record:
- Opening width and wall spacing
- Bottom geometry, including radii and chamfers
- Base width and thickness
- Rod diameter
- Required contact-tip form
This depth micrometer buying guide check prevents a long-range instrument from failing at the workstation simply because its base or tip cannot enter the feature. A narrow slot can reject a physically shorter instrument, while a broad face can make a thin, narrow base unstable.
Decide whether a depth micrometer or another depth tool fits the job
A digital depth micrometer suits tight-tolerance work because its controlled screw, fine adjustment and stable base support comparative inspection when the base sits squarely. A digital depth caliper reaches features faster and handles broad general-purpose checks, but its base stability, resolution and repeatability may not meet a close tolerance.
| Tool | Main advantage | Choose it when | Limitation |
|---|---|---|---|
| Digital depth micrometer | Controlled contact and fine adjustment | Depth tolerance is tight, readings must compare closely, or the feature needs a stable seated base | Higher cost, slower handling and possible access limits from the base or rod |
| Digital depth caliper | Fast access and broad everyday use | Production checks value speed and the opening is easy to reach | Beam flex, base movement or lower resolution can affect repeatability |
| Standard outside digital micrometer | Measures external thickness or diameter | You need an outside dimension | It does not measure internal axial depth |
| Bore gauge | Evaluates internal diameter and taper | Hole geometry matters more than bottom depth | It is the wrong choice for a simple axial-depth check |
| Depth gauge | Basic depth measurement | Tolerance is moderate and simple contact control is sufficient | Resolution and seating control vary by design |
| Height gauge | Measures from a surface plate | Layout or coordinate-style inspection is required | It is slower and less portable at the machine |
Choose a depth caliper for speed, a depth micrometer for controlled comparative inspection, and a bore gauge when diameter or taper drives acceptance. A narrow slot may favour a slender rod and suitable tip; a height gauge wins when the part can be referenced on a surface plate.
Compare total cost, handling time and required repeatability before selecting.
Use the selected size without creating avoidable measurement error
Clean the reference face, base and contact tip before measuring; remove chips, oil and burrs. Zero the digital depth micrometer on a known datum or reference block, then seat the base squarely so it bridges the opening without rocking. Advance the spindle or rod gently until the contact reaches the bottom.
Do not force the part, frame or screw, and read the display while maintaining alignment.
Check these points before trusting the digits:
| Check | What it tells you | What it does not tell you |
|---|---|---|
| Resolution | The displayed increment, such as 0.001 mm or 0.00005 in | That the reading is accurate to that increment |
| Accuracy or maximum permissible error | The stated deviation under specified conditions | How well you personally seat and align the instrument |
| Repeatability | The spread of repeated readings | Whether the first reading used correct technique |
| Test conditions | The temperature, force and setup behind the specification | That results transfer unchanged to a different workstation |
A tilted rod, rocking base, contamination or a radiused bottom can create more error than the displayed resolution. A flat tip may bridge a flat bottom, while a radius can make it touch high or slide sideways.
Digital micrometers for depth measurement commonly reference 20 °C; hand-warmed parts, cold components and long metal configurations shift readings. Long rod assemblies are harder to align and less convenient for repeated single-depth checks.
Turn the measurement requirement into a purchase specification
A depth micrometer buying guide should end with a specification tied to the part drawing, not a catalogue label. Record the datum, deepest feature, opening width, wall spacing, bottom geometry, and clearance. Then select the digital depth micrometer size for options that reach the feature without forcing the final millimetres of travel.
| Nominal size | Confirm before purchase | Failure if ignored |
|---|---|---|
| 0–25 mm or 0–1 in | Maker’s actual usable range and rod travel | The tip stops short |
| 0–12 in | Actual rod intervals and base dimensions | The base cannot bridge the opening |
| Rod set | Quantity, increments, storage, calibration or interchangeability | A rod fits one feature but not another |
Ask the supplier to confirm:
- Required range, deepest feature, base width and thickness
- Rod or spindle diameter, contact-tip form, and clearance from walls, radii and chamfers
- Resolution, accuracy, repeatability, and stated test conditions
- Metric or inch unit system, battery life, display, and data-output capability
- Environmental protection and calibration certificate or documentation
Confirm that the base bridges your specific opening without rocking; size alone does not describe base width. Buyers in Mumbai can use an industrial measurement supplier such as Yamayo Instruments to compare digital depth micrometers, depth calipers and related inspection tools against the drawing and calibration needs.
Choose the smallest range that reaches the deepest feature with clearance and working margin, unless a broader rod set serves multiple part families; verify the geometry before purchase.
Related product
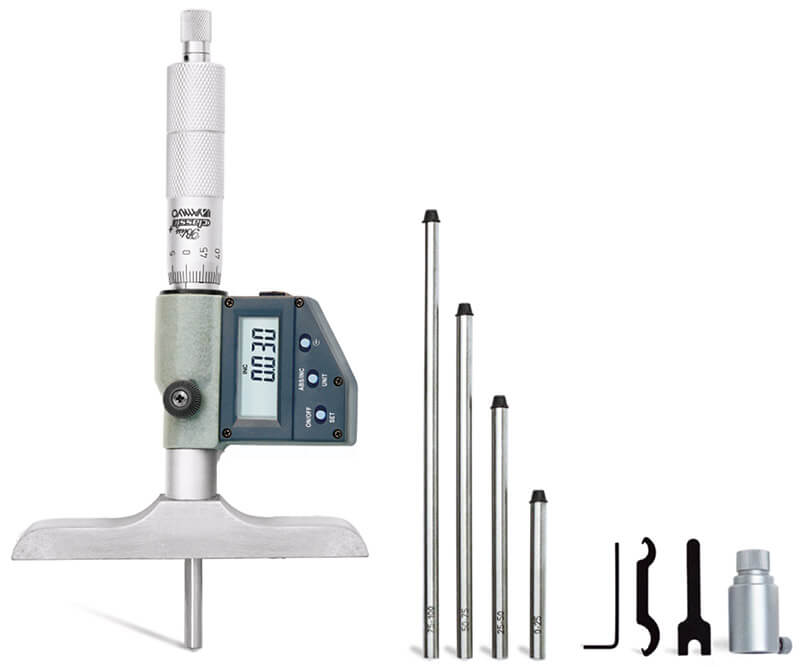 | Depth Measurements Digimatic Depth Micrometers The Digimatic Depth Micrometer is a high-precision digital measuring instrument designed for accurate measurement of... View product → |
Frequently asked questions
How do you choose a digital depth micrometer size?
Measure from the actual datum surface to the bottom of the deepest feature, then add working margin so the spindle does not run at the end of its travel.
What must you check before buying a digital depth micrometer?
Check that the base spans the opening, sits flat on the datum, and that the contact tip reaches the feature without touching its sides.
When is another depth tool better than a digital depth micrometer?
Use another depth tool when the opening is too narrow for the base, the surface is irregular, or the feature needs a narrow rod, hook, or probe.
How can you reduce measurement error with a depth micrometer?
Clean the datum and feature, seat the base consistently, keep the spindle aligned with the feature, and use light, repeatable measuring force.