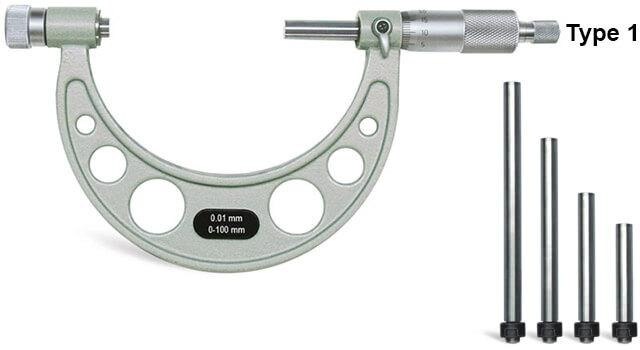
A swappable anvil does not make every machinery measurement reliable: the contact shape, reference setting, temperature, force, and feature geometry all affect the result. By the end, you will be able to choose the right configuration, verify it after an anvil change, measure consistently, and specify the support needed for traceable inspection.
Key takeaways
- Match anvil geometry to the feature, not only its nominal diameter.
- Reference the micrometer after every anvil change.
- Control measuring force, workpiece temperature, and alignment.
- Specify range, resolution, tolerance, and calibration support before buying.
Match the anvil to the machinery feature
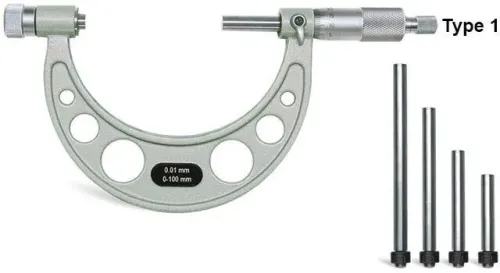
For digital micrometers for interchangeable anvils machinery inspection, match the contact geometry to the feature, not merely to its nominal diameter. A longer replacement anvil extends range for stepped shafts and journals, but it also increases handling and alignment risk.
| Feature | Suitable anvil and configuration | Main caution |
|---|---|---|
| Stepped shaft | Standard flat anvils with an extended-range frame | Keep both faces square to the shaft axis; a tilted frame can read undersize. |
| Shoulder | Disc or offset anvil | The disc must reach the shoulder without contacting the adjacent step. |
| Groove | Blade or narrow anvil | Check that the blade sits at the groove bottom, not on its sidewall or a burr. |
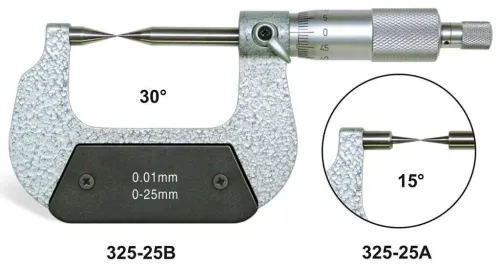
| Spline | Pointed or spline-profile anvils | Identify whether the drawing specifies tooth thickness, root width, or measurement over pins. |
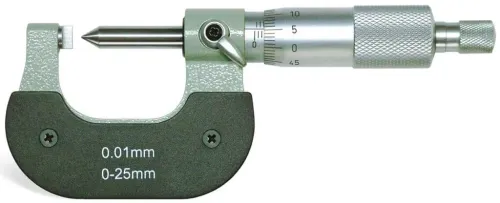
| Thread | V-anvil with conical spindle, or a dedicated thread micrometer | Measure the specified thread element, not the major diameter. |
| Thin wall | Disc anvils with broad, controlled contact | Excessive force can deflect the wall and produce a false low reading. |
| Curved surface | Spherical anvils | Match contact radius and place the anvils on a clean, stopped surface. |
Clean the part and contacts before every reading; oil, chips, and raised damage can become the measured dimension. These digital micrometers applications remain external only: choose an inside micrometer, bore gauge, or three-point gauge for an internal diameter. Carbide faces resist wear, but they do not make dirty or rotating work safe to measure.
Reference the instrument every time you change anvils
Reference the instrument every time you change an anvil: the swap creates a new range, contact geometry, and alignment condition. A body calibrated without its installed anvil and setting combination does not prove that configuration accurate.
- Stop the spindle, clean the anvil thread, shoulder, and seating faces, then confirm the anvil length and range against the instrument label or configuration record.
- Start the anvil by hand. If the thread resists, remove it; forcing a cross-threaded anvil tilts the contact face and damages repeatability.
- Push the anvil fully against its locating shoulder, keep it square, and tighten it only to the manufacturer’s specified torque. Do not use pliers.
- Record the installed anvil identity and range. Store unused anvils with their setting standards so they cannot be mixed.
- Close the spindle gently, or use the supplied setting standard, gauge block, or known master part. Apply the instrument’s normal measuring force, then zero or enter the reference value.
A zero reading alone is insufficient. Check the instrument at several calibrated points across the selected range, then measure a stable master repeatedly to separate bias from repeatability. Let the micrometer and part stabilise near 20 °C; unequal temperatures can create micrometre-level error over 100 mm.
This control is essential for interchangeable micrometers for machinery, where an incorrect anvil or offset can pass through an otherwise disciplined inspection.
Control force, temperature, and inspection technique
A dependable reading starts with clean contact faces and a clean part. Remove chips, oil films, burrs, and raised damage; a burr on a shoulder can become the reported dimension, regardless of digital resolution. Let the micrometer and steel workpiece stabilise near the 20 °C reference temperature.
Unequal temperatures can create several micrometres of error across 100 mm.
Use the ratchet or friction thimble consistently. Bring the spindle into contact without forcing it, twisting the frame as a lever, or squeezing a thin wall; excess force can distort the part and produce a false size.
For digital micrometers applications, compare the instrument’s stated maximum permissible error with the tolerance, not merely its 0.001 mm display resolution.
Record enough detail for another inspector to reconstruct the measurement:
- Part number, feature location, nominal size, and acceptance limits
- Micrometer identification, range, resolution, and installed anvil code
- Date, operator, temperature, and the measurement force method used
- Individual readings, repeated readings, and the final decision
After changing an anvil, verify zero or a reference standard, then check several gauge blocks, setting standards, or a known master across the working range. Repeatability is not accuracy: a worn face, wrong anvil, bad zero, or calibration offset can produce tightly grouped but biased readings.
Include the standard’s identification and calibration status in the record.
Choose the right tool for the dimension and tolerance
Choose a digimatic interchangeable outside micrometer when you need micrometre-level measurement of several external ranges, but do not want a separate frame for every shaft, journal, collar, or shoulder size. Confirm the manufacturer’s maximum permissible error; a 0.001 mm display does not guarantee 0.001 mm accuracy.
| Option | What it means | When it applies |
|---|---|---|
| Fixed-range micrometer | One range, fixed anvil, fewer configuration errors | Choose for repetitive production checks within one range and tight tolerances |
| Adjustable micrometer | One range with a barrel or sleeve that can be calibrated | Choose when occasional zero correction matters, but you do not need multiple anvil lengths |
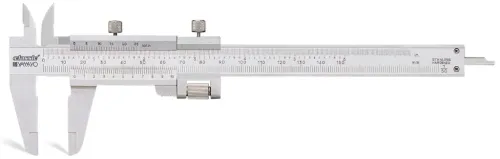
| Caliper | Fast outside, inside, and depth measurements with lower resolution and force control | Choose for general fabrication checks and generous tolerances |
| Bore gauge | Internal-diameter comparison measurement requiring a setting reference | Choose for bores; an outside micrometer is the wrong tool |
| Snap gauge | Rapid fixed-limit acceptance or rejection | Choose for high-volume go/no-go inspection, not for recording the actual size |
| Coordinate measuring machine | Probe-based measurement of locations, profiles, and relationships | Choose for complex geometry, datum-controlled inspection, or a full dimensional report |
Interchangeable micrometers for machinery reduce the number of complete instruments, but every anvil change adds a possible mix-up, damaged thread, or wrong zero offset. Check the installed combination against its setting standard, gauge blocks, or a documented master, then verify more than one point across the range.
For high-volume work, several fixed-range micrometers can cost less time than repeated anvil changes. If the feature is internal, use a bore gauge or three-point internal gauge instead.
Specify the instrument and support before you buy
Ask the digital micrometer supplier in Aurangabad for a complete specification, not only a resolution such as 0.001 mm. Confirm the measuring range for each anvil, stated maximum permissible error, measuring force, temperature reference of 20 °C, output format, and whether the design follows ISO 3611 or ASME B89.1.13.
1. Request the exact Digimatic interchangeable outside micrometer model, serial-number format, included anvil positions, supplied setting standards, and the procedure for zeroing after every anvil change.
2. Obtain an instrument-specific calibration certificate. It must show the serial number, range or test points, measured errors, environmental conditions, standards used, and traceability. If the certificate carries a NABL logo, check that the laboratory’s accreditation scope covers dimensional calibration; the logo alone is not proof.
3. Confirm that replacement anvils, setting standards, batteries, thimble or spindle components, and protective cases remain available. Ask whether calibration covers every anvil and range combination, not just the micrometer body.
4. Get written repair arrangements, local service availability, response time, calibration turnaround, warranty terms, and the promised delivery lead time. Yamayo Instruments should be able to state these points clearly in the quotation, rather than leaving support to verbal assurance.
Reject a quote that gives display resolution but no maximum permissible error or reference standard. Without those controls, a correct-looking reading after an anvil change remains unproven.
Related products
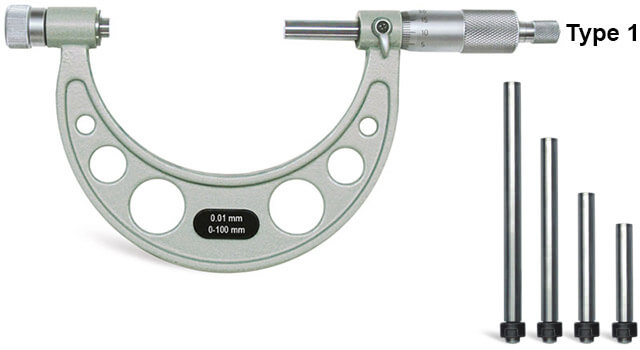 | Micrometers Interchangeable Outside MicrometersMicrometers Interchangeable Outside Micrometers The Interchangeable Outside Micrometer is a versatile precision measuring instrument designed for accurate... View product → |
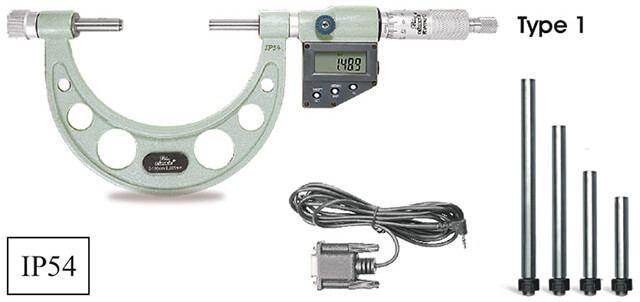 | Micrometers Digimatic Interchangeable Outside Micrometers Digimatic Interchangeable Outside Micrometers The Digimatic Interchangeable Outside Micrometer is a high-precision digital measuring instrument... View product → |
Frequently asked questions
How do you match an interchangeable anvil to a machinery feature?
Choose contact geometry for the feature: longer anvils suit stepped shafts and journals, while different contact shapes suit specific surfaces.
Why reference a micrometer after changing anvils?
Anvil changes can alter alignment and zero position, so reference the instrument before taking inspection measurements.
What inspection conditions affect digital micrometer accuracy?
Control measuring force, workpiece and instrument temperature, alignment, cleanliness, and the repeatability of your technique.
How do you choose the right digital micrometer for a dimension?
Compare the required measuring range, resolution, contact geometry, tolerance, and the instrument's ability to support the inspection method.
What should you specify before buying an interchangeable micrometer?
Specify the dimension, tolerance, feature shape, anvil requirements, reference method, calibration needs, and operator support.
Related product
 | Calipers Digimatic Caliper with Interchangeable Anvils Digimatic Caliper with Interchangeable Anvils The Digimatic Caliper with Interchangeable Anvils is a versatile precision digital measuring instrument... View product → |