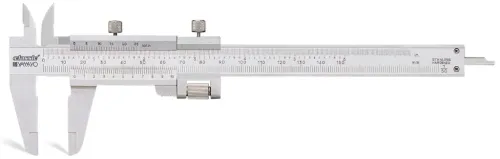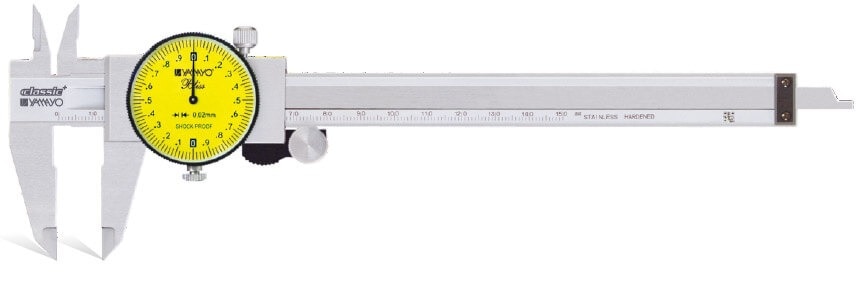
A fine-adjustment screw changes how you bring the jaws onto a part, but it does not make a caliper force-controlled, self-aligning, or automatically accurate. By the end, you will be able to compare adjustment types, take reliable workshop readings, run an in-house acceptance check, and specify the range, accuracy, documentation, and service support your work requires.
Key takeaways
- Use the screw to position jaws gradually, not to improve measurement accuracy.
- Clean the jaws and workpiece before checking zero or taking a measurement.
- Check repeatability, jaw alignment, slider movement, and scale condition before acceptance.
- Match range, resolution, accuracy, jaw design, and durability to the workpiece.
What the Fine-Adjustment Screw Changes in Real Workshop Use
A fine-adjustment screw changes jaw positioning, not measurement accuracy. With a screw adjustment caliper, bring the slider near the work, lock it if needed, and advance the jaws gradually instead of pushing the slide by hand.
This gives steadier contact and a more repeatable approach, but it does not control measuring force or correct poor alignment. Set zero by closing clean jaws lightly and rotating the bezel; do not mistake the bezel for the adjustment screw.
| Option | Workshop difference | Limitation |
|---|---|---|
| Screw-adjustment dial caliper | Controlled final jaw movement; easier to approach a dimension without overshooting | Still needs correct alignment, light pressure, and stable contact |
| Ordinary dial caliper | Fast direct sliding and immediate dial reading | Hand movement can overshoot or vary the contact pressure |
| Vernier caliper | No dial mechanism; reading depends on aligning vernier marks | Slower to read, especially when the scale is dirty or visibility is poor |
| Digital caliper | Clear electronic display and quick unit changes | Battery, contamination, and display faults add failure points |
Before treating a listing as a screw-adjustment model, confirm the photographs or datasheet show a fine-adjustment screw, thumbwheel, or named equivalent—not merely a slider lock. Ask for the metric or inch system, range, graduation, jaw functions, maximum permissible error, and supplied calibration report. A 0.01 mm graduation is resolution, not accuracy.
Clean and inspect the jaw faces before any dial caliper comparison; a burr can produce a stable but false reading.
How to Set, Read, and Position the Jaws Without Creating Error
Burrs create false, repeatable readings: remove them from the workpiece and clean the jaws, then inspect by touch or with magnification. Close clean jaws lightly and set zero with the bezel; the fine-adjustment screw positions the slider but does not control contact force.
1. For an outside diameter, place the external jaws across the part’s true diameter, not at an angle. Bring them together with the screw until both faces touch lightly, then rock the caliper through a small arc and use the smallest stable reading.
2. For an inside diameter, insert the internal jaws fully and keep their measuring edges square to the bore axis. Open them gradually, rock across two directions, and record the largest stable reading; an angled jaw position reads small.
3. For depth, seat the caliper’s base flat on the reference surface before extending the depth rod. Keep the rod parallel to the feature’s axis, because a tilted rod measures a diagonal.
4. For a step dimension, seat the fixed step face against the lower surface and the sliding step face against the upper surface. Keep both faces parallel to their surfaces and apply only light, repeatable pressure.
5. Let the part and dial calipers reach the workshop temperature before measuring precision dimensions; hold the frame rather than the jaws to limit hand heat. Read with your eye perpendicular to the dial to prevent parallax, and wait until the pointer stops before recording the graduation and revolution count.
A Workshop Acceptance Check Is More Than a Zero Check
A zero check only shows that the jaws meet at one position; it does not prove an industrial dial caliper measures correctly elsewhere. Clean the jaws, close them lightly without forcing the slide, and confirm the pointer returns to zero.
Use a reference suited to each measurement mode. Gauge blocks test the external jaws; a calibrated ring or suitable internal standard tests inside jaws.
Check several points across the range, such as 0, 25, 75, 125, and 150 mm on a 0–150 mm caliper, or equivalent low, middle, and high points on a 0–300 mm model.
- Repeat each point at least three times, removing and replacing the caliper between readings. Record the spread; a changing result indicates poor technique, looseness, contamination, or worn contact surfaces.
- Compare each reading with the reference value and record the signed error. Check both near the lower range and near maximum opening, where jaw alignment and wear can create different errors.
- Use the manufacturer’s stated maximum permissible error as the acceptance limit, not the dial graduation. A 0.01 mm dial does not guarantee 0.01 mm accuracy.
- Record the caliper identification, reference-standard certificate, temperature, readings, and pass/fail decision.
This in-house check is verification, not traceable calibration. Send the caliper to a traceable calibration laboratory when a customer, quality system, contract, or regulated process requires a certificate; when results approach the MPE; or after repair, impact, or disputed readings. A laboratory can document uncertainty and traceability that a workshop comparison cannot.
Which Specifications Decide Whether the Caliper Fits Your Work
Start with the tolerance, not the dial colour. In a dial caliper comparison, separate graduation from accuracy: 0.01 mm and 0.02 mm describe readable increments, while maximum permissible error (MPE) describes allowed measurement error.
| Specification | What to compare | Decision |
|---|---|---|
| Range | 0–150 mm is shorter and usually stiffer; 0–300 mm reaches larger parts but commonly has higher MPE and more jaw deflection | Choose 150 mm unless the work genuinely exceeds it |
| Graduation and MPE | A 0.01 mm dial is not automatically more accurate than a 0.02 mm dial. Typical market MPE is about ±0.02–0.03 mm at 150 mm and ±0.03–0.05 mm at 300 mm | Reject the instrument when its MPE approaches the part tolerance; compare a micrometer instead |
| Jaw geometry | Check pointed, knife, offset, or carbide faces against grooves, shoulders, thin walls, and rough stock | Match contact shape to the feature, or readings will vary |
| Depth rod | Compare a narrow blade rod with a round rod and confirm its travel and shoulder access | Choose the rod that seats squarely in your holes or recesses |
| Measurement system | Dial gives an immediate analog indication; vernier needs scale interpretation; digital eases data capture but needs battery control | Select the system your inspection records and environment support |
| Documentation | Request MPE by range and location, adjustment hardware, calibration certificate, and ISO 13385-1 test reference | Do not treat stated resolution as compliance evidence |
For machining and maintenance, 0–150 mm with screw adjustment suits frequent setup checks. Fabrication often needs 300 mm reach. Incoming inspection needs traceable calibration; final inspection needs a tool whose MPE is comfortably below tolerance. Yamayo Instruments can help compare those specifications rather than treating “industrial dial caliper” as a complete specification.
Related products
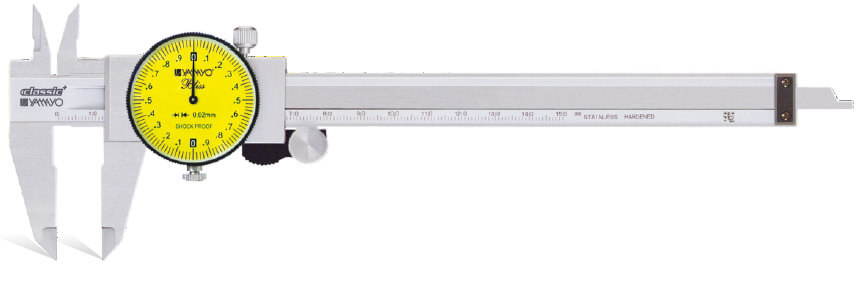 | Calipers Dial Calipers The Dial Caliper is a precision measuring instrument designed for accurate outside diameter (OD), inside diameter (ID), depth, and step... View product → |
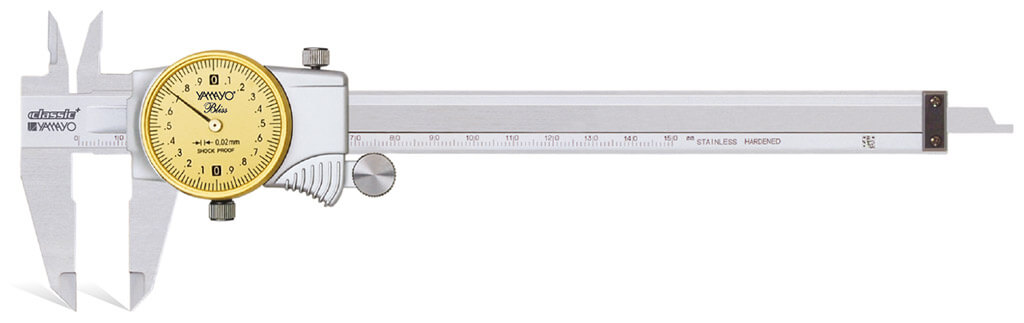 | Calipers Dial Calipers with New Design Golden Dial Dial Calipers with New Design Golden Dial The Dial Caliper with New Design Golden Dial is a precision measuring instrument designed for accurate... View product → |
When to Buy, Reject, Maintain, or Replace a Screw-Adjustment Model
A dial caliper is the wrong tool when the required tolerance approaches its stated maximum permissible error, or when repeatability and contact-force control are critical. Choose a micrometer or another controlled-force instrument instead; a 0.01 mm graduation does not create 0.01 mm accuracy.
Before ordering, complete these checks:
- Specify the measurement system, range, graduation, jaw geometry, and external, internal, depth, and step functions required for the job.
- Confirm that the screw-adjustment caliper has a genuine rack-and-pinion fine-adjustment mechanism or thumbwheel. Do not count the bezel as adjustment hardware: the bezel sets zero, the lock holds a reading, and the screw moves the slider.
- Request the stated maximum permissible error, a current calibration report if required, and the calibration standard or traceability details shown on it.
- For a search for dial calipers with screw adjustment in Aurangabad, confirm stock location and delivery time separately from the specification. Listings often omit whether the dial is metric or inch.
- Ask how to obtain replacement screws, racks, pinions, dial assemblies, and calibration service. A cheap instrument becomes costly when one damaged part means replacement.
- Inspect a sample: close clean jaws lightly, check zero, operate the screw through its travel, test the slider lock, and look for dial sticking or backlash.
Clean the beam, rack, jaws, and workpiece after use; remove burrs before measuring. Replace the instrument when faces remain damaged, the screw slips, the dial does not repeat, or calibration fails after adjustment. For critical work, send it to a traceable calibration laboratory rather than treating an in-house check as calibration.
Frequently asked questions
What does the fine-adjustment screw change on a dial caliper?
It changes how you position the slider and jaws. It does not increase the caliper’s measurement accuracy.
How do you reduce errors when using a screw-adjustment caliper?
Clean the contact surfaces, position the jaws squarely, bring the slider near the work, and advance the screw gradually without forcing the jaws.
Is checking zero enough when accepting a dial caliper?
No. Check zero along with jaw alignment, smooth slider movement, repeatability, dial response, and condition of the measuring faces.
Which specifications matter when choosing an industrial dial caliper?
Compare measuring range, resolution, stated accuracy, jaw dimensions, depth-rod design, locking method, materials, and resistance to workshop damage.
When should you replace a screw-adjustment dial caliper?
Replace it when it fails repeatability checks, has damaged or misaligned jaws, binds during travel, shows unreliable dial movement, or no longer suits the required accuracy.