A thread can pass a major-diameter check and still fail to assemble because its pitch diameter is wrong. By the end, you will know how to measure pitch diameter correctly, choose contact geometry and digital features, compare alternative inspection methods, and specify equipment that fits a maintenance workshop.
Key takeaways
- Measure pitch diameter to verify thread fit, not crest diameter alone.
- Clean the thread, align the anvils, and use consistent measuring force.
- Match V-anvil and conical-point geometry to the thread form and pitch.
- Use thread gauges for fast acceptance checks and micrometers for dimensional diagnosis.
Why Pitch Diameter Matters More Than Crest Diameter
Pitch diameter tells you whether an external thread will engage its mating thread correctly. It is the effective diameter at which the thread ridge and groove widths balance for the specified pitch, so it reflects flank contact and functional fit.
Major, or crest, diameter only measures the outside limits of the thread; a damaged crest can change that reading without showing whether the flanks will mate.
A standard outside micrometer is often the wrong tool because its flat anvil and spindle contact the crests. It can deliver a repeatable number that is precise but not representative of pitch diameter.
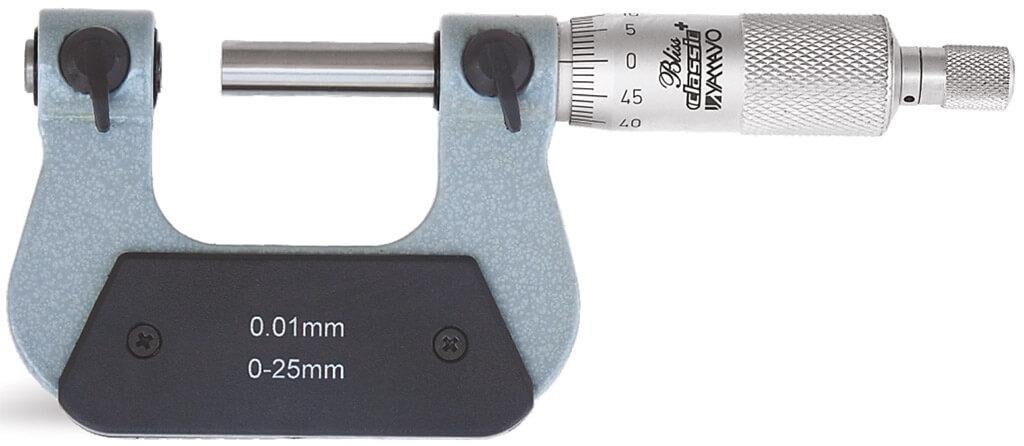
A screw thread micrometer reaches the flanks with a V-shaped anvil and a conical or blade-type spindle, measuring the dimension that controls engagement.
Specify the contact geometry before accepting a screw thread micrometer in Indore:
- Match the included angle to the thread, such as 60 degrees for metric or Unified threads and 55 degrees for Whitworth threads.
- Match the anvil and spindle to the nominal pitch or TPI; the wrong pitch can sit high or low on the flanks and distort the result.
- Confirm the thread form and range, then use the correct interchangeable anvil set.
This instrument checks pitch diameter without cutting an installed or newly machined part. It does not prove lead, flank angle, surface damage, or functional fit. Before an acceptance decision, verify zero, repeatability, and calibration across the intended range; a zero check cannot reveal pitch-dependent error or damaged contacts.
How to Take a Repeatable Thread Micrometer Reading
Start with a clean, temperature-stable part and a micrometer whose contacts match the thread. A reading from the wrong anvil set can look precise while measuring the wrong geometry.
1. Identify the thread as, for example, M12 × 1.75 or 1/2-13 UNC. Confirm the thread angle, form, pitch or TPI, and the required measurement location.
2. Remove chips, oil, burrs, and raised damage from the thread flanks. Wipe the V-anvil and conical spindle without rounding or polishing the contact faces.
3. Allow the workpiece and instrument to reach the measurement environment. Use 20 °C as the reference temperature; wait longer if the part came from machining or is warm near a machine.
4. Fit the matching V-anvil and conical spindle. Check the instrument’s zero and calibration status, then verify it against the specified setting standard when one is available.
5. Place the V-anvil into one flank space and bring the conical spindle onto the opposite flanks at the defined axial location. Keep the micrometer square to the thread axis; tilting changes the contact position and reading.
6. Turn the ratchet until it slips consistently, without forcing the spindle. Take three readings at the same location, releasing and reapplying the instrument each time. Repeat at another defined location if thread variation matters.
7. Record the result in millimetres or inches, including the thread designation, measured value, instrument ID, anvil set, temperature, date, operator, and calibration status. Note the location and all repeated values, not only their average.
Use a calibrated GO/NO-GO ring gauge separately when assembly acceptance matters; the micrometer gives a dimension, while the gauge checks functional fit.
Choose the Contact Geometry Before You Choose the Display
Specify the contact geometry first: a V-shaped anvil and conical or blade spindle must match the thread’s included angle, pitch, and form. A contact mismatch can produce a stable, precise reading that does not represent pitch diameter.
Confirm zero, repeatability, and calibration status before accepting parts; a zero check will not expose scale error or pitch-dependent error.
| Thread system | Angle and form | Contact specification |
|---|---|---|
| Metric ISO | 60° V-thread; pitch in millimetres | Anvils marked for the exact pitch, such as 1.5 mm |
| Unified UN | 60° V-thread; pitch stated as TPI | Unified 60-degree contacts for the specified TPI |
| Whitworth/British | 55° rounded V-thread; pitch stated as TPI | Whitworth 55-degree contacts; do not substitute 60-degree anvils |
Write the purchase specification as a complete measurement requirement:
- State the supported thread angle, thread form, pitch or TPI, nominal measurement range, resolution, and maximum permissible error.
- Choose a range that covers the pitch diameter limits without forcing the spindle near its travel stop.
- Treat a 0.001 mm display as resolution, not accuracy; verify the stated error across the intended range with certified standards or a calibrated master.
- Specify a ratchet or friction thimble for controlled measuring force, plus interchangeable anvils when maintenance covers multiple pitches or standards.
- Request data output such as USB, Bluetooth, or an SPC port when readings enter inspection records; otherwise document the thread designation, anvil set, instrument ID, temperature, and calibration status.
- Compare digital screw thread micrometer in Indore listings with digital micrometers in Indore carefully: an outside micrometer’s display does not make its contacts suitable for thread flanks.
Match the Inspection Method to the Question
Use the method that matches the decision: a dimensional number, functional fit, profile defect, or complete geometric record. These tools are not interchangeable; a precise reading from the wrong contact can approve a bad thread.
| Method | Question it answers | Use it when |
|---|---|---|
| Thread micrometer | What is the external thread’s pitch diameter? | Measure an installed or freshly machined thread without cutting it. Match the V-anvil and spindle to its pitch and angle. Use the result for dimensional control, not sole proof of fit. |
| GO/NO-GO ring gauge | Will the thread assemble within acceptance limits? | Make a functional acceptance decision. The calibrated GO ring must pass as specified, while the NO-GO ring must stop at the limit defined by the governing thread standard. |
| Three-wire method | What is the high-accuracy pitch diameter over wires? | Verify precision external threads with clean access, suitable wires, and controlled conditions. It is slower than a thread micrometer. |
| Optical comparator | Does the projected profile show correct form or visible damage? | Check flank angle, pitch, crest, root, burrs, dents, and other two-dimensional defects. It does not prove functional assembly. |
| Coordinate measuring machine | Where are the flanks, axis, lead, and other coordinates? | Characterise complex parts, investigate recurring errors, or produce a traceable report when setup time is justified. |
| Standard outside micrometer | What is the plain external diameter? | Check major diameter or a non-threaded shaft quickly. Flat contacts do not reliably reach the flanks, so the reading is not pitch diameter. |
When the decision requires both size and fit, record the thread-micrometer value and then run the calibrated ring-gauge check. A zero check alone cannot support acceptance; verify repeatability and calibration across the intended range.
Build a Reliable Indore Maintenance Measurement Setup
A chip trapped between a thread flank and anvil can make a clean instrument report a false diameter. Wipe the part and contacts with a lint-free cloth, remove coolant and abrasive dust, and store the micrometer in its case rather than on the machine.
Let the workpiece and instrument reach the same temperature, preferably the 20 °C reference temperature, before measuring a hot part from production.
Before ordering, ask a micrometers supplier in Indore to confirm:
- Calibration traceability, certificate details, maximum permissible error, and recalibration service
- Replacement batteries, spare V-anvil and conical-spindle sets, and repair turnaround
- Thread angle, pitch or TPI range, measurement range, resolution, and metric, Unified 60-degree, or Whitworth/British 55-degree compatibility
- A written operating method for the thread standard you use
- Battery type, expected availability, and whether the display retains readings during replacement
Record the thread designation, nominal size, pitch or TPI, thread angle or standard, contact set, instrument identification, reading, temperature, operator, and calibration status. “12.03 mm” alone cannot be reproduced or audited.
Yamayo Instruments can be considered when you need the instrument, contact geometry, calibration support, and operating documentation treated as one measurement system. Compare total downtime, not only purchase price: an unavailable pitch-specific anvil or delayed calibration can stop inspection longer than the original saving.
Related product
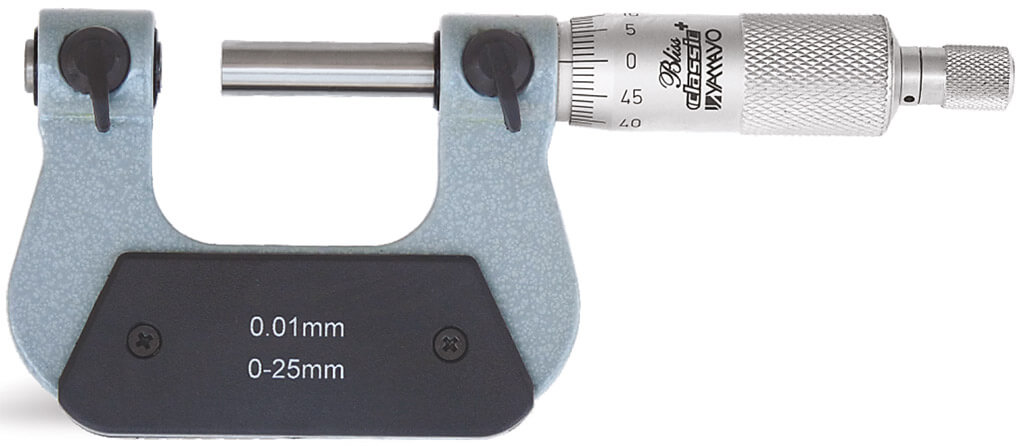 | Micrometers Screw Thread Micrometer The Screw Thread Micrometer is a precision measuring instrument specifically designed for accurate measurement of the pitch... View product → |
Frequently asked questions
Why does pitch diameter matter more than crest diameter?
Pitch diameter reflects flank contact and functional fit, while crest diameter alone cannot confirm that mating threads will engage correctly.
How do you take a repeatable thread micrometer reading?
Clean the thread, check zero, align the contacts with the thread axis, apply consistent force, and repeat the measurement.
How do you choose thread micrometer contact geometry?
Select contact shapes that match the thread form and pitch; choose the geometry before prioritising a digital display.
When should you use a thread gauge instead of a micrometer?
Use a gauge for quick go/no-go acceptance and a thread micrometer when you need a dimensional reading for diagnosis or process control.
How can an Indore maintenance team build a reliable measurement setup?
Keep calibrated instruments, suitable contact geometries, cleaning materials, reference standards, and recorded measurement procedures together.