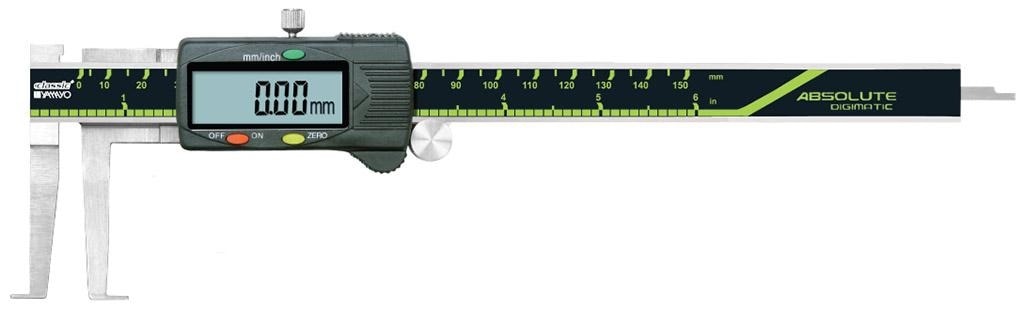
A narrow internal groove can defeat a standard caliper even when the required dimension looks simple. You will learn where knife-edge contacts must sit, how to take a repeatable reading, and when a point micrometer, bore gauge, or CMM is the better inspection method.
Key takeaways
- Seat both jaw tips on opposing feature walls, not on the entry lip.
- Match jaw thickness and tip shape to the groove’s width and depth.
- Use a point micrometer when contact access or precision demands it.
- Verify caliper readings with a standard, known part, or second gauge.
What an Inside Knife-Edge Caliper Actually Measures
The displayed value is the distance between the two jaw tips at their contact points. Thin, blade-like inside jaws enter through a narrow opening, pass the lip, and seat against opposing flanks or walls inside the feature.
The reading represents that separation at the selected depth; it does not automatically represent the part’s overall bore diameter or the distance to its outside surface.
For inside point caliper applications, place each tip firmly against a defined measurement surface. A groove-width check places the tips on opposite groove flanks. A recess check places them on the opposing internal walls at the specified depth.
Keep the caliper square to those surfaces, because a tilted tool measures a longer or shorter diagonal instead of the intended dimension.
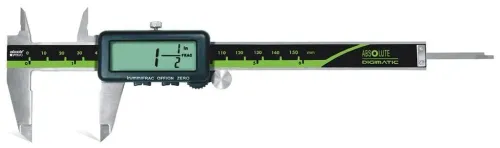
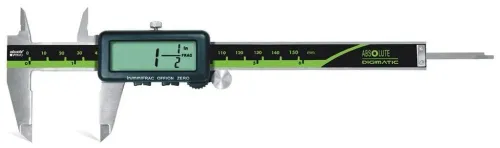
A digimatic knife edge caliper gives this dimension directly on its display. An inside spring caliper or inside point caliper normally transfers it: set the tips in the feature, remove the tool without disturbing the setting, and compare it with an outside micrometer or another reference instrument.
For an internal diameter, do not accept the first stable number. Rock or sweep the caliper through the opening until the reading reaches its maximum; a single position can leave the tips off the true diametral line and produce a low result.
The narrow tips improve access, not automatically accuracy, so burrs, deflection, rocking, and excessive contact force still affect the result.
How to Measure an Internal Groove Without Misreading It
A reliable internal groove measurement comes from seating the tips on the intended flanks, keeping the caliper square, and repeating the reading after moving through the feature.
1. Clean the bore, groove, and jaw tips. Remove chips, oil film, and burrs; a burr can add to the reading or prevent a tip from reaching the flank.
2. Confirm that the tips fit the groove opening and reach its flanks without touching the bore shoulder, bottom radius, or fillet. A tip that bridges a radius measures a tangent, not the groove dimension.
3. Insert the caliper to the same depth at each trial. Keep its beam square to the groove so the tips oppose the surfaces directly. For groove width, contact the two opposing flanks; for a recess opening, contact its side walls; for an internal diameter, place the tips across opposite points.
4. Apply steady, light pressure. Do not force the tips into a narrow opening, because flexing the tool or part produces a false reading.
5. Rock or sweep the caliper through the feature. An internal diameter is correct at the maximum reading, while one fixed position can sit off the true diametral line and read low.
6. Repeat at several clock positions and record the readings, depth, and contact orientation. Large variation points to taper, out-of-roundness, burrs, or poor alignment.
A digimatic knife-edge caliper gives a direct reading. An inside spring caliper requires transfer to an outside micrometer, while point micrometer internal measurement requires purpose-built internal contacts; an external point micrometer is not a substitute. These checks define practical inside point caliper applications.
Match Jaw Geometry to the Feature You Need to Check
Jaw thickness, tip length, and contact angle decide whether the reading represents the feature you intend to inspect. A tip that is too wide or blunt bridges a groove fillet, touching a tangent or shoulder instead of the groove flank.
| Feature | Contact orientation | Geometry that matters |
|---|---|---|
| Groove width | Place the tips on opposing groove flanks, aligned with the groove’s axial or transverse width | Tip thickness must clear the opening; tip length must reach the flanks without touching the bottom radius |
| Internal diameter | Set the tips on opposite surfaces across the bore and keep the tool centred | Tip reach must exceed the bore entry depth; equal, stable contact prevents a chord reading |
| Slot width | Place each tip against one slot sidewall, perpendicular to the slot length | Narrow tips enter the opening, while adequate stiffness limits deflection during contact |
| Recess location | Contact one tip on the recess shoulder and the other on a defined bore face or datum | Jaw reach and shoulder clearance determine whether the distance is from the correct reference |
For inside point caliper applications, match the jaw span to the minimum bore diameter and the opening width, then check the insertion angle. Long, slender tips reach deeper recesses but amplify rocking and deflection; short tips offer better control where access permits.
Inside knife-edge calipers suit sharp-edged, narrow features. A large radius, burr, or soft edge shifts the contact point and invalidates the intended dimension, while a round bore needing high-confidence form control calls for a bore gauge or three-point micrometer instead.
Knife-Edge Caliper Versus Point Micrometer and Other Gauges
Use a knife-edge caliper when you need a quick, direct-reading check of a narrow internal groove, slot, recess, or interrupted thin feature. Its blade-like tips enter the opening and contact opposing flanks; the displayed value is the distance between those contact points, not automatically the bore diameter.
| Option | What it measures | When it applies |
|---|---|---|
| Knife-edge caliper | Internal groove width, slot width, recess width, or accessible shoulder distance | Use for fast checks where the tips reach the surfaces and the feature is not heavily burred or rounded |
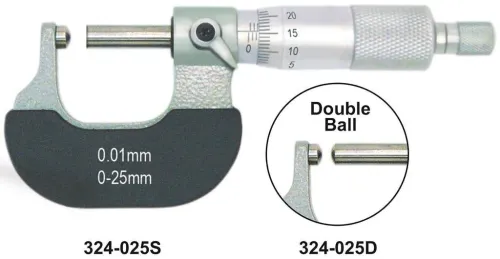
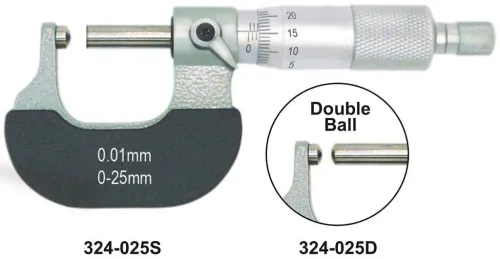
| Internal point micrometer | Controlled two-point point micrometer internal measurement | Choose it for small internal diameters or recesses requiring better contact control and repeatability than a caliper |
| Point outside micrometer | External groove width, web thickness, or distance to an external groove bottom | Use when the pointed faces contact outside features; it is not automatically suitable for internal measurement |
| Bore gauge, three-point bore micrometer, or air gauge | Internal diameter with stronger location and repeatability | Use for tight-tolerance round bores; verify form, taper, and cylindricity separately |
A transfer inside caliper does not display the final size. Set its points in the feature, remove it without disturbing the setting, and compare it with an outside micrometer or reference standard.
Reject the knife-edge choice when a large radius, soft edge, burr, or high-confidence roundness requirement prevents stable point contact. For any instrument, control temperature and contact force, then repeat readings at several clock positions before accepting production parts. Choose a point micrometer for applications involving external grooves, not merely because its pointed anvils look similar.
A Practical Selection and Verification Checklist
Define the acceptance decision before choosing the instrument: feature type, nominal size, tolerance, units, minimum bore, groove depth, shoulder clearance, and allowable jaw insertion angle. Specify jaw-tip thickness and reach as well as range. A 0.01 mm display increment is resolution, not accuracy; request maximum permissible error, repeatability, calibration requirements, and reference temperature.
| Instrument | What it means | When it applies |
|---|---|---|
| Digimatic knife edge caliper | Direct reading; pointed jaws contact opposing flanks | Narrow grooves, keyways, slots, and interrupted recesses |
| Inside spring or point caliper | Transfer setting; read it with an outside micrometer or reference instrument | Where direct digital access is impossible and transfer work is controlled |
| Two- or three-point internal micrometer | Controlled internal contact; three points stabilise location in a round bore | Small bores needing better control than a knife-edge caliper |
| Bore gauge or air gauge | Compares size against a reference; supports tighter control | Production acceptance requiring repeatability, not just a quick dimension |
Before release, run this checklist:
- Inspect tips for damage, burrs, looseness, and rounded contact points; confirm they reach the intended flanks.
- Clean the part and standard, then zero the caliper without forcing the jaws.
- Verify against a calibrated ring, plug, step, or setting standard near the production size.
- Measure the artifact repeatedly and at several clock positions using consistent contact force.
- Control or record temperature, operator, serial number, standard, date, and observed error.
- Reject the instrument if error or repeatability exceeds the acceptance limit.
Yamayo Instruments can help you compare model geometry and calibration documentation; ask for the exact specification sheet, not only the catalogue resolution. For point micrometer for applications inside a bore, use an instrument designed for internal contacts rather than substituting an external point micrometer.
Related product
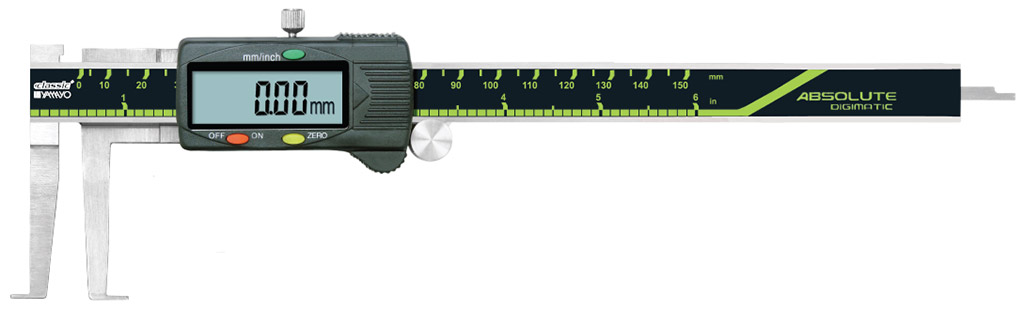 | Calipers Digimatic Inside Knife Edge Point Type Calipers Digimatic Inside Knife Edge Point Type Calipers The Digimatic Inside Knife Edge Point Type Caliper is a precision digital measuring instrument... View product → |
Frequently asked questions
What does an inside knife-edge caliper actually measure?
It measures the distance between the two inside jaw tips at their contact points. The tips must touch opposing walls or flanks of the internal feature.
How do you measure an internal groove without misreading it?
Insert the thin jaws past the entry lip, seat each tip against an opposing wall, rock the caliper through its smallest reading, and repeat the measurement.
When should you use a point micrometer instead of a knife-edge caliper?
Use a point micrometer when you need controlled spindle contact, finer resolution, or access to a specific internal flank that caliper jaws cannot seat on reliably.
How do you verify an inside knife-edge caliper reading?
Check jaw movement and zero, clean the contact surfaces, measure a known reference or master part, and compare repeat readings from both operators and directions.